The Gauteng Sun vs. Your Roof: Why UV Degradation is the Silent Killer of Liquid Membranes (And How to Protect It)
While most homeowners in Johannesburg, Pretoria, and the wider Gauteng province only start worrying about their roofs when the heavy summer thundershowers roll in, the real damage happens under clear, blue skies. Nestled high on the South African plateau, regions across the Highveld experience intense, unfiltered ultraviolet (UV) radiation. This relentless sun acts as a silent killer for exposed flat roofs, slowly baking the flexibility out of standard liquid waterproofing membranes. Over time, UV degradation leaves your roof brittle, cracked, and completely defenseless against the next big downpour.
Protecting your property investment does not always require a total, costly roof replacement. Instead, it requires understanding the unique atmospheric conditions of the Gauteng region, how the African sun interacts with chemical compounds, and how to shield your waterproofing membranes before the first drop of rain falls. This comprehensive guide breaks down the science of sun damage on roofs, explains why standard waterproofing methods fail prematurely, and outlines the precise steps you need to take to ensure your home remains leak-free for decades.
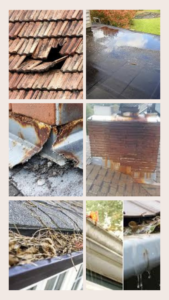
1. The Science of Sun Damage on Highveld Roof Membranes
To understand why flat roofs fail so frequently in Gauteng, you have to look at the geographical map of South Africa. Johannesburg sits at approximately 1,750 metres above sea level, and Pretoria is close behind at around 1,300 metres. This high altitude means the atmosphere is significantly thinner than it is at coastal cities like Durban or Cape Town.
With a thinner atmospheric layer, there are fewer air molecules, dust particles, and water droplets to scatter and absorb the sun’s rays. As a direct result, Gauteng receives some of the highest levels of ambient ultraviolet (UV) radiation in the country. This environmental factor triggers a highly destructive process on building materials known as photo-oxidation.
Understanding Photo-Oxidation
Liquid waterproofing membranes—whether they are acrylic, polyurethane, or bitumen-based—are composed of complex organic polymer chains. These chains give the material its elasticity, allowing it to stretch and contract as the building moves.
When UV light hits an unprotected polymer membrane, the high-energy photons break the chemical bonds within the molecular structure. This is photo-oxidation. The process alters the material at a molecular level:
- Chain Scission: The long, flexible polymer chains are broken into shorter fragments.
- Cross-Linking: The broken chains recombine in irregular, rigid patterns.
- Loss of Plasticisers: The chemical agents added to keep the coating flexible evaporate under sustained heat and UV exposure.
As these chemical changes progress, the membrane loses its primary defense mechanism: its ability to stretch.
The Phenomenon of Thermal Shock
In Gauteng, photo-oxidation does not work alone; it has a highly destructive partner known as thermal shock. The climate of the Highveld is characterised by extreme temperature swings, particularly during the shoulder months and mid-summer.
On a typical December afternoon in Pretoria, an unshaded flat concrete or metal roof can easily reach surface temperatures of $65^\circ\text{C}$ to $75^\circ\text{C}$ under the direct midday sun. Suddenly, a massive convective thundershower rolls in. Within a matter of minutes, cold rainwater douses the scorching roof surface, plunging the temperature down to $15^\circ\text{C}$ or lower.
[ Intense Midday Sun ] ---> Roof Surface Heats to 70°C (Membrane Expands)
                                     |
                          [ Sudden Thundershower ]
                                     |
                                     v
[ Rain Douses Surface ] ---> Roof Temp Plunges to 15°C (Membrane Contracts Rapidly)
                                     |
                                     v
                  Thermal Shock: Rigidity Leads to Cracking
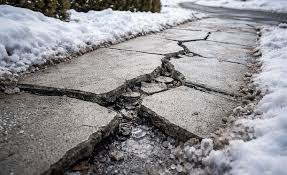
This rapid temperature drop causes instantaneous structural contraction. A healthy, flexible waterproofing membrane can handle this sudden movement easily. However, a membrane that has been brittle-baked by UV radiation cannot stretch or contract. The sudden internal stress exceeds the material’s remaining tensile strength, causing it to snap, tear, and fracture across the surface.
2. Why “Standard” Waterproofing Isn’t Enough
A common mistake among Gauteng property owners is buying a generic, off-the-shelf liquid waterproofing bucket, painting it over a problematic joint or flat roof surface, and assuming the job is complete. While these products are often labeled as “UV Resistant,” there is a massive difference between a product resisting UV light temporarily and surviving decades of unfiltered Highveld exposure without a protective shield.
The Problem with Exposed Membranes
When a standard liquid acrylic or rubberised bitumen membrane is applied and left directly exposed to the sky, its deterioration follows a highly predictable timeline:
- Phase One (Months 1–6): Color Fading and Loss of Gloss
The vibrant color of the coating begins to dull. This is the first visual indicator that the top microscopic layer of the polymer is breaking down. - Phase Two (Months 6–12): Chalking
If you wipe your hand across the dry roof surface, it comes away covered in a fine, powdery white or grey residue. This powder consists of loose binder particles and pigments that have been detached from the film by UV degradation. The membrane is literally turning to dust. - Phase Three (Months 12–24): Crazing and Micro-Cracking
Fine, web-like cracks (crazing) develop across the surface. These cracks are initially superficial, but they significantly increase the surface area exposed to oxygen and sunlight, accelerating deeper degradation. - Phase Four (Months 24+): Delamination and Failure
The cracks penetrate completely through the membrane down to the underlying substrate (concrete, timber, or metal). The edges of the cracks curl upward, causing the membrane to peel away in sheets. When the next storm hits, water seeps directly under the remaining material, trapping moisture against the structure and causing widespread leaks inside the home.
+-----------------------------------------------------------------------+

|                       STAGES OF UV DEGRADATION                        |
+-----------------------------------+-----------------------------------+

| Stage 1: Color Fading & Dullness  | Top microscopic polymer layer     |
|                                   | breaks down.                      |
+-----------------------------------+-----------------------------------+

| Stage 2: Chalking                 | Surface turns to fine, powdery    |
|                                   | white or grey residue.            |
+-----------------------------------+-----------------------------------+

| Stage 3: Micro-Cracking           | Fine, web-like cracks develop and |
|                                   | increase exposed surface area.    |
+-----------------------------------+-----------------------------------+

| Stage 4: Delamination & Failure   | Cracks penetrate substrate;       |
|                                   | membrane peels away in sheets.    |
+-----------------------------------+-----------------------------------+

The Myth of the Quick Fix
Many homeowners attempt to solve this cycle by simply painting a fresh layer of the same liquid waterproofing over the old, degraded surface. This is a temporary band-aid that often exacerbates the issue.
The underlying, chalking layer lacks structural integrity. Applying a new coat over a powdery, delaminating base means the new layer cannot bond effectively. The entire system remains structurally weak, and the sun will simply bake through the new layer even faster, leading to a complete system failure that requires scraping the entire roof back to bare concrete or metal.
3. The Shield: Aluminium Solar-Reflective Coatings
To break this cycle of destruction, professional roofing contractors rely on a fundamental principle of asset protection: if you cannot change the weather, you must deflect it. This is where solar-reflective topcoats come into play.
Think of an aluminium solar-reflective coating as a high-SPF sunscreen designed specifically for your building’s roof. Instead of allowing the raw ultraviolet and infrared energy to penetrate the waterproofing membrane, the coating reflects the vast majority of that energy back into the atmosphere.
       [ UV & Infrared Energy ]
              \       ^
               \     /  (Up to 70% Reflected Back)
                v   /
  +---------------------------------------+ <--- Aluminium / Acrylic Topcoat

  |=======================================| <--- Waterproofing Membrane
  |                                       |
  |          Concrete Substrate           |
  +---------------------------------------+
How Reflective Coatings Protect Your Roof
The most effective and widely trusted reflective system for flat roofs and parapet walls is aluminium-pigmented bitumen paint (often referred to in South Africa as “Silver Paint” or “Aluminium Roof Paint”). These coatings are formulated with premium bitumen binders mixed with a high concentration of leafing aluminium flakes.
When the paint is applied over a cured waterproofing membrane, the aluminium flakes naturally float to the surface as the solvent evaporates. They align horizontally, forming a continuous, overlapping metallic barrier across the roof. This metallic skin serves several vital functions:
- Total UV Blockade: The polished aluminium surface acts as a literal mirror, reflecting up to 70% of solar radiation. Because the UV light never reaches the underlying liquid membrane, photo-oxidation is ground to a near-total halt.
- Mitigation of Thermal Shock: Because the roof reflects solar energy rather than absorbing it, the maximum surface temperature drops drastically. A roof that would normally hit $70^\circ\text{C}$ might only reach $40^\circ\text{C}$ with a clean reflective coating. This significantly reduces the temperature differential when a sudden afternoon thundershower strikes, eliminating the destructive forces of thermal shock.
- Preservation of Essential Oils: In bitumen-based systems or torch-on membranes, extreme heat drives out the essential volatile oils that keep the asphalt pliable. The cooling effect of an aluminium shield preserves these oils, preventing the membrane from drying out, shrinking, and becoming brittle.

The Financial Bonus: Slashed Energy Bills
While the primary purpose of a reflective topcoat is waterproofing preservation, it offers an incredible secondary benefit for Gauteng homeowners: improved thermal efficiency.
Flat concrete roofs are notorious for acting as thermal storage units. They absorb massive amounts of heat during hot summer days and slowly radiate that heat downward into the living spaces of the home long into the night. This forces air conditioning units and cooling fans to run continuously, driving up municipal electricity bills.
By reflecting the sun’s heat away before it ever penetrates the roof slab, an aluminium reflective coating acts as a highly effective passive cooling system. Internal room temperatures directly beneath the flat roof can drop by several degrees Celsius, significantly lowering your home’s cooling demand and slashing your energy expenditure during Gauteng’s long summer months.
4. Step-by-Step Guide to Applying a Reflective Shield
If your flat roof currently has an exposed liquid membrane or an old torch-on system that has lost its silver luster, applying a fresh reflective layer is a priority. However, success depends entirely on proper preparation and application techniques.
Step 1: Deep Cleaning and Surface Preparation
You cannot apply a high-quality coating over dust, moss, or degrading material and expect it to hold.
- Wash the Surface: Use a high-pressure water blaster to clear away dirt, bird droppings, and loose debris. If there is stubborn moss or algae growth (common in damp corners or shaded areas of flat roofs), treat the area with a specialized biocide or anti-fungal wash, then scrub thoroughly.
- Remove the Chalk: If the previous liquid membrane has started chalking, use a stiff-bristle broom along with water to scrub away the powdery residue completely.
- Dry Completely: Allow the roof to dry fully. Applying a solvent-based aluminium paint over a damp or wet substrate traps moisture underneath, leading to blistering, bubbling, and premature delamination when the sun heats the roof.
Step 2: Inspecting and Repairing Existing Defects
Before opening the reflective paint tin, you must ensure the structural integrity of the underlying waterproofing system.
- Check the Seams: Carefully inspect all overlaps, joints, and flashings. If any edges of a torch-on membrane or acrylic lap are lifting, use a professional-grade waterproofing compound reinforced with a polyester membrane netting to seal them back down down firmly.
- Address Blisters: If you find bubbles or blisters (pockets of trapped air or moisture), slice them open with a utility knife in a cross pattern. Peel back the flaps, allow the area to dry completely, apply an appropriate primer, and patch the area with fresh waterproofing material, ensuring it lays completely flat.
- Ensure Level Substrates: Check for areas where pooling water occurs. While reflective coatings can handle dampness, standing water accelerates wear. Ensure your drainage points and scuppers are completely free of obstructions.
Step 3: Stirring and Mixing the Product
Aluminium roof paint is a unique product; it settles significantly while sitting on retail shelves. The heavy aluminium flakes sink to the bottom of the tin, leaving a dark liquid at the top.
- Do Not Just Shake the Can: Shaking is insufficient to distribute the metallic flakes evenly.
- Use a Flat Paddle: Use a wide, flat wooden or mechanical stirring paddle. Scrape the very bottom of the tin to lift the thick paste of aluminium flakes.
- Stir Continuously: Stir the paint thoroughly until the liquid turns into a completely uniform, brilliant silver color with no dark streaks. Keep stirring occasionally during application to prevent the flakes from settling back to the bottom while you work.
Step 4: Execution and Application
- Choose the Right Weather Window: In Gauteng, check the forecast carefully. Do not apply the coating if rain is imminent within 24 hours. Additionally, avoid working in the extreme heat of a midday summer sun, as the solvent will evaporate too quickly, preventing the aluminium flakes from “leafing” properly onto the surface. The ideal time to apply is early morning on a clear, dry day.
- Application Tools: Use a high-quality, sheepskin roller for wide, open flat areas, and a soft-bristle block brush for edges, parapet walls, flashings, and tight corners.
- Apply Evenly: Apply the coating in smooth, even strokes. Avoid applying it too thickly in a single coat, as this can trap solvents and lead to cracking. Two thin, uniform coats are always superior to one thick layer. Allow the first coat to dry fully according to the manufacturer’s specifications before applying the second coat.
5. Comprehensive Maintenance Checklist for Gauteng Homeowners
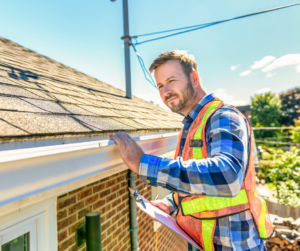
Waterproofing a flat roof is never a “set-and-forget” project. Because of Gauteng’s harsh atmospheric conditions, a proactive approach to maintenance is the single most effective way to avoid catastrophic leaks and tens of thousands of Rands in structural repairs.
Use this operational checklist to audit your roof at least twice a year—ideally once in May (before the dry, cold winter settles in) and once in September (before the first summer rains arrive).
+------------------------------------------------------------------------+

|                      ROOF INSPECTION AUDIT TIMES                       |
+------------------------------------+-----------------------------------+

| May (Pre-Winter Audit)             | Check before dry, cold weather    |
|                                    | causes shrinking.                 |
+------------------------------------+-----------------------------------+

| September (Pre-Summer Audit)       | Check before heavy convective     |
|                                    | thundershowers arrive.            |
+------------------------------------+-----------------------------------+
1. Visual Structural Audits
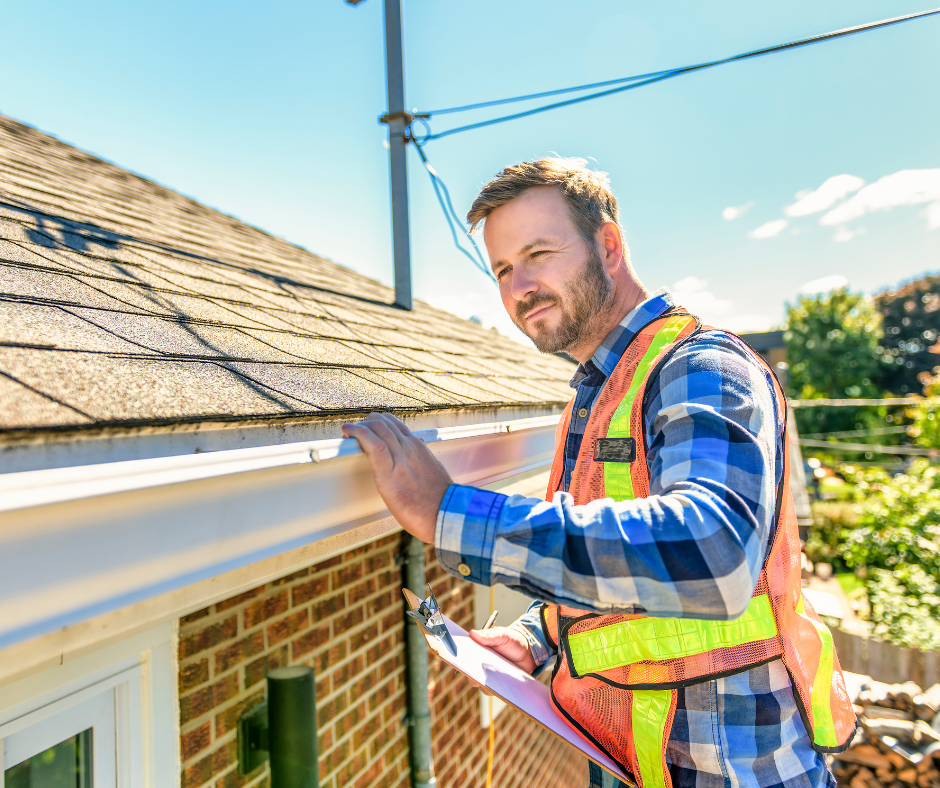
- Walk the entire perimeter of the flat roof. Look specifically at the parapet walls and flashings where the roof meets the vertical wall. These joints experience the highest rate of structural movement and are prime targets for UV cracking.
- Inspect the color consistency of your reflective coating. If you notice dark patches, black streaks, or a complete loss of silver sheen, it means the aluminium flakes have eroded, exposing the vulnerable waterproofing membrane underneath to direct solar radiation.
- Look for signs of “alligatoring.” This is a trade term for a membrane that has cracked in a pattern resembling alligator skin. If you see this, the material has already lost its elasticity and requires immediate remediation.
2. Drainage and Flashings Audit
- Clear all leaf debris, twigs, and dirt from your gutters, downpipes, and drainage scuppers. Blocked drains cause water to pool deeply on flat roofs. When this pooling water is heated by the intense summer sun, it acts like a magnifying glass, magnifying UV intensity and cooking the membrane underneath.
- Inspect counter-flashings (the metal strips that cover the top edge of the waterproofing membrane attached to walls). Ensure they are firmly anchored and that the silicone sealant along the top edge has not perished or peeled away under the sun.
3. Re-Coating Timelines
- Acrylic-Based Systems: In Gauteng, exposed acrylic liquid membranes should receive a fresh, UV-stabilised topcoat every 2 to 3 years.
- Bitumen/Torch-On Systems: A high-quality bituminous torch-on membrane shielded with aluminium paint should be re-silvered every 3 years. Skipping this cycle allows the underlying torch-on bitumen to dry out, leading to unrepairable cracking that requires a total re-torching of the entire property.
Summary Table: Proactive vs. Reactive Roof Management
| Feature / Factor | Proactive Roof Management (Sunscreen Strategy) | Reactive Roof Management (Wait-for-a-Leak Strategy) |
|---|---|---|
| Initial Action | Waterproofing is applied, immediately shielded with an aluminium reflective topcoat. | Waterproofing is applied and left completely exposed to the Highveld sky. |
| UV Exposure Effects | Up to 70% of UV rays are reflected; the underlying membrane remains flexible. | Raw UV rays cause photo-oxidation, breaking polymer chains down completely. |
| Thermal Shock Resistance | Surface runs up to $30^\circ\text{C}$ cooler; minor thermal expansion/contraction. | High surface temperatures ($75^\circ\text{C}$) drop instantly in rain, causing deep cracks. |
| Re-coating Lifespan | Simple re-silvering required every 2 to 3 years over a clean, sound surface. | Requires scraping, priming, and total replacement of degraded layers within 2–4 years. |
| Household Energy Impact | Lower internal room temperatures; reduced reliance on costly air conditioning systems. | High thermal mass absorption; heat radiates down into rooms, driving up power bills. |
| Long-Term Costs | Minor, predictable maintenance expenses over a 15-to-20-year cycle. | Massive, unexpected capital outlays for interior water damage and structural roof rebuilds. |
Conclusion:
Act Before the Clouds Gather
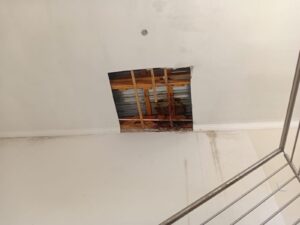
The clear blue skies of Gauteng can be highly deceiving. While they make for beautiful weather, they subject your flat roof to a silent, non-stop chemical assault. Ultraviolet degradation does not make a sound, and it does not leave a puddle on your floor until the damage is already done. By the time you notice a brown water stain spreading across your living room or office ceiling, the sun has spent years quietly destroying your roof’s primary line of defense.
If you want to ensure your home remains entirely safe from the unpredictable, intense Highveld elements, you must change your perspective on roof maintenance.
Do not wait for a major summer storm to test the integrity of an unprotected, sun-baked roof. Take control of your property’s health by conducting an inspection this week, cleaning your drainage systems, and investing in a high-quality aluminium solar-reflective coating.
Shifting from a reactive mindset to a proactive strategy protects your physical structure, optimizes your home’s energy efficiency, and keeps your hard-earned money exactly where it belongs, in your pocket.